Low Cost PBX for Communication
Table of Contents
ABSTRACT…………………………………………………
1.Introduction……………………………………………..
1.1.Problem definition…………………………………….
1.2.Solution to this problem……………………………….
2.Asterisk program…………………………………………
2.1.How it works…………………………………………
3.PBX Installation………………………………………….
3.1.Download the ISO…………………………………….
3.2.Open the installation file……………………………….
3.3.Choose full setup……………………………………..
3.4.Packages installs……………………………………..
3.5.Configure the network…………………………………
3.6.Time zone selection…………………………………..
3.7.Choose your root password…………………………….
4.PBX from inside………………………………………….
4.1.How to login…………………………………………
4.2.Web application………………………………………
4.3.Add telephone……………………………………….
4.3.1.Add a user in PJSIP extension………………………..
4.3.2.Apply the user……………………………………..
5.Zoiper………………………………………………….
5.1.Create a user in zoiper…………………………………
5.2.The connection between two telephones………………….
6.EVALUATION……………………………………………
6.1.Advantage of using Asterisk……………………………
6.1.1.Lowest cost……………………………………….
6.2.Disadvantage of using Asterisk………………………….
6.2.1.Does not support all telephones……………………….
7.List of references…………………………………………
Table of Figures
Figure 1: Example of two branches connected together………………..
Figure 2: PSTN……………………………………………….
Figure 3: how to download from website……………………………
Figure 4: installation prompt……………………………………..
Figure 5: installing packages…………………………………….
Figure 6: configure the network…………………………………..
Figure 7: Time zone……………………………………………
Figure 8: Root password………………………………………..
Figure 9: PBX login page……………………………………….
Figure 10: the page after you login………………………………..
Figure 11: web application setting…………………………………
Figure 12: add extensions………………………………………
Figure 13:PJSIP extension………………………………………
Figure 14: User setting…………………………………………
Figure 15: Aplly the user………………………………………..
Figure 16: Zoiper logo………………………………………….
Figure 17: creating a user……………………………………….
Figure 18: Account type………………………………………..
Figure 19: fill the user information…………………………………
Figure 20: telephones communication……………………………..
Using an IP based PBX, companies can facilitate high quality voice communication between branches over a WAN, thereby not paying PSTN rates.
By connecting incoming PSTN lines with the PBX system, incoming calls can be routed to different branches over a WAN. Outbound calls can also be routed to the best value trunking providers, reducing outbound call costs.
The Asterisk project started in 1999 when Mark Spencer released the initial code under the GPL open source license. Since that time, it has been enhanced and tested by a global community of thousands. Today, Asterisk is maintained by the combined efforts of Digium and the Asterisk community.
1.1. Problem definition
Quick and efficient communication between employees is an essential business requirement. Unfortunately, companies often suffer high costs in facilitating phone communication between employees at different branches.
1.2. Solution to this problem
To solve the problem you have to use Asterisk to add PBX with low cost.
Asterisk is an open source framework for building communications applications. Asterisk turns an ordinary computer into a communications server. Asterisk powers IP PBX systems, VoIP gateways, conference servers and other custom solutions. It is used by small businesses, large businesses, call centers, carriers and government agencies, worldwide. Asterisk is free and open source. Asterisk is sponsored by Digium.
Today, there are more than one million Asterisk-based communications systems in use, in more than 170 countries. Asterisk is used by almost the entire Fortune 1000 list of customers. Most often deployed by system integrators and developers, Asterisk can become the basis for a complete business phone system, or used to enhance or extend an existing system, or to bridge a gap between systems.
Most Asterisk-based systems and solutions require additional components: phones, gateway appliances or interface cards and other hardware. Companies that deploy open source solutions frequently need training and often prefer to have support from a trusted partner. Digium meets all of these needs with a family of product and service offerings built exclusively for the Asterisk market.
2.1. How it works
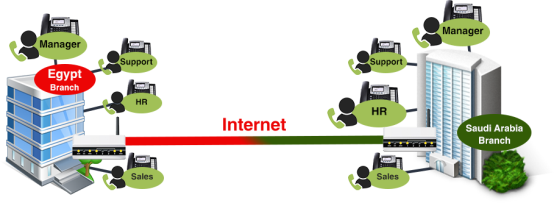
Figure 1: Example of two branches connected together
Figure1 shows you how Asterisk connects two branches together even if the next branch is with long distance.

In figure 2 you can see the Public Switched Telephone Network (PSTN), which refers to the international telephone system based on copper wires carrying analog voice data. This is in contrast to newer telephone networks base on digital technologies.
PSTN uses circuit switching to allow users to make landline telephone calls to one another. The call is placed after it is routed through multiple switches. These switches are found in a central office (CO) or in a wire center. Ultimately, voice signals are able to travel over the connected phone lines.
When two telephones are connected, analog voice data is transmitted over the copper wires of the PSTN. The voice data is then converted into electrical signals which are eventually routed in the switching centers. Finally, a connection is made and communication is possible.
The version that we are installing is a free version of ASTERISK. You have to follow these steps in order to install the ASTERISK.
3.1. Download the ISO
In order in install the program you have to download the ISO version and this version is online
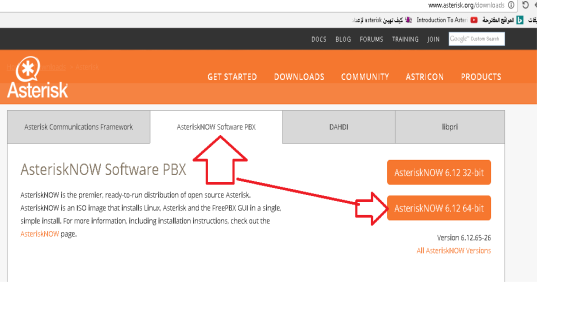
Figure 3: how to download from website
You have to go on www.asterisk.org/downloads (Figure 3) then click on Asterisk software PBX and go to Asterisk NOW 6.12 and chose what your computer can handle whether 64bit or 32bit. In our installation we chose 64bit.
3.2. Open the installation file
Select a computer to install the freePBX Distro on. everything on this computer will be deleted and replaced with the freePBX distro. Configure the computer to boot from a DVD or CD. Insert the DVD or CD into the computer and turn it on.
3.3. Choose full setup
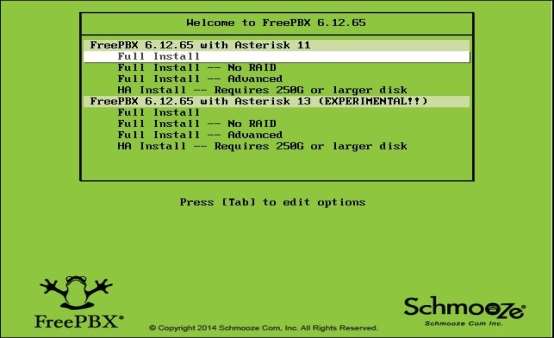
As in figure 4 the installer will begin with a prompt to select what you want, we chose the Asterisk Version Full to install.
3.4. Packages installs
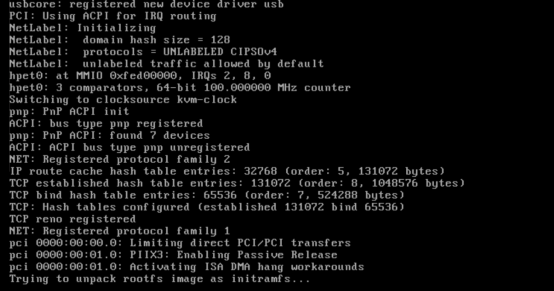
In figure 5 the system will present downloads of the install package from the internet. That should take 3-5 minutes.
3.5. Configure the network
In figure 6 you will see option to configure your network. The default selections are fine in most cases, so just press TAB until the red “OK” box is highlighted in white and then press ENTER.
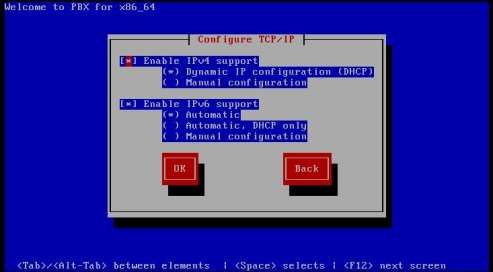
Figure 6: configure the network
3.6. Time zone selection
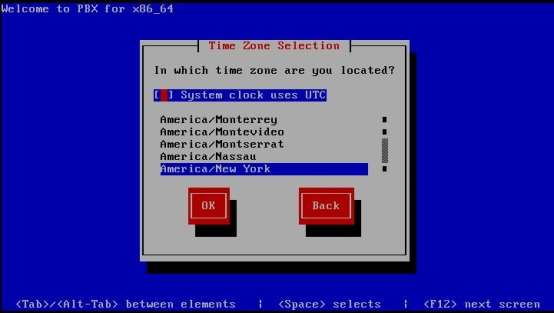
In figure 7 you will reach the “Time Zone Selection” screen. If your system clock uses GMT (most do not) Use the up and down arrows to select the time zone where you will use the system, and then hit TAB until the red “OK” button is highlighted in white. Then hit ENTER.
3.7. Choose your root password
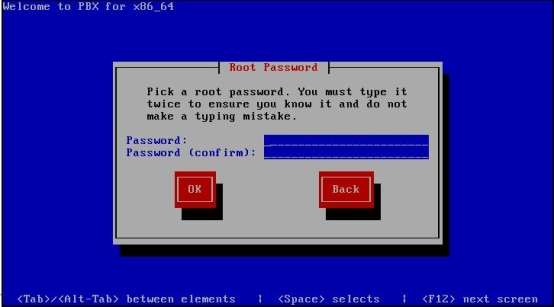
In figure 8 the installer will ask you to select your Root password. The Root password is the password you’ll use to login to the Linux command prompt later. Selecting a secure password is very important. Type the password, hit TAB, type it again, hit TAB, and then hit ENTER.
The installer will install the boot loader and some other scripts, and then reboot your computer again.
4.1. How to login
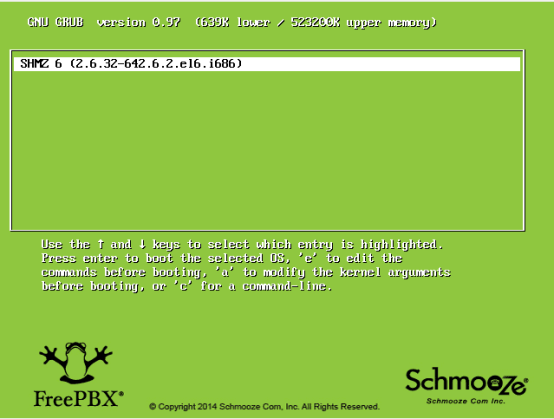
Figure 9 shows you the login screen when you want to run the PBX.
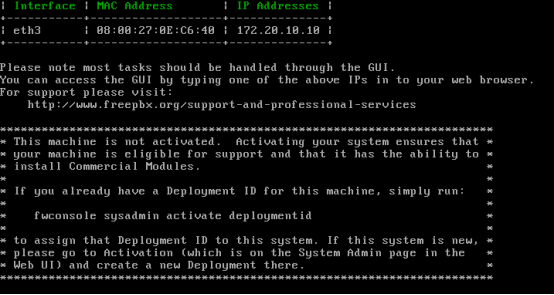
Figure 10: the page after you login
In figure 10 the important thing is the IP. We have to take this IP to run in on web browser to login into web application to add users.
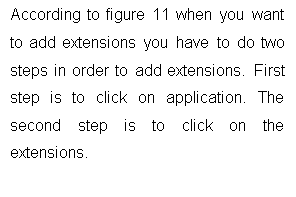 4.2. Web application
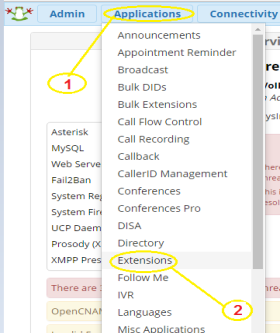
Figure 11: web application setting
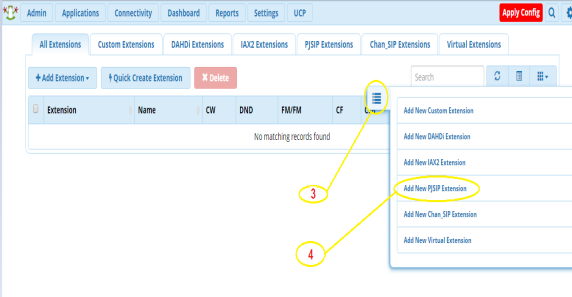
Figure 12 is the next page of figure 11. Click on add new PJSIP extension.
4.3. Add telephone
The next steps explain how to add a telephone line and follow these instructions to complete of create new user.
4.3.1. Add a user in PJSIP extension
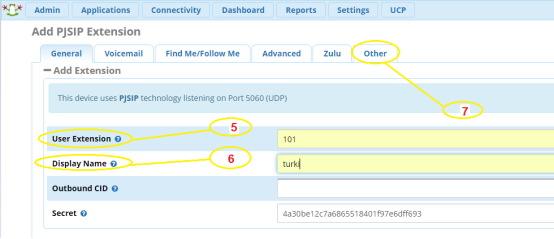
In figure 13 you have many things to fill out. First thing is the name of user extension and that must not a copy of old user extension. Second thing is the display name that is shows to you in VOIP witch is refer to the person who call.
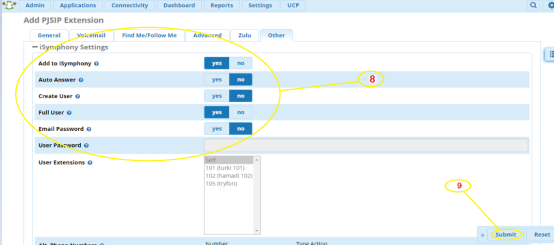
In figure 14 which is the user setting you have to select the permissions that you want to apply in this user. Then click on submit.
4.3.2. Apply the user

When you create a user you have to apply this user, without applying the user it will not work well.


5.1. Create a user in zoiper

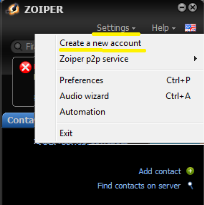

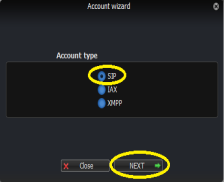
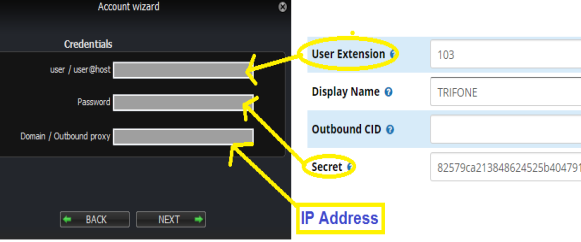
Figure 19: fill the user information
In figure 19 we have two parts the one in right is coming from the web application CPannel and the one in left coming from Zoiper. What you have to do is to fill the same information in the right to the left. There something addition which is the IP. You can see the IP in figure 10.
5.2. The connection between two telephones
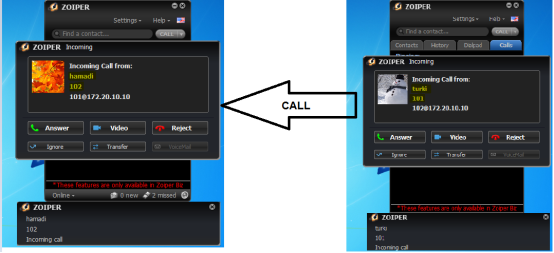
Figure 20: telephones communication
In figure 20 you can see what happen when you call from telephone to another.

As we saw before that Asterisk can connect two branches or more together we will illustrate the advantages and disadvantages of using Asterisk.
6.1. Advantage of using Asterisk
6.1.1. Lowest cost
Asterisk is open source which means that you can download and use it for free without any charge and you can make free calls between branches even if the branches in your country or outside.
6.2. Disadvantage of using Asterisk
6.2.1. Does not support all telephones
The telephone that is used SCCP cannot communicate with telephone use SIP. Asterisk support SIP only.
[1]http://www.asterisk.org/.
[2]http://www.voip-info.org/, .
[3]https://coredial.com, [.
[4]https://en.wikipedia.org, .
[5]https://www.digium.com, .
[6]https://www.youtube.com/watch?v=hgs0GR4ylxA,