Tools and Techniques for Interactive Website
M2 you must write a report to explain the tools and techniques you used in the creation of your interactive website.
I used Adobe muse to create my website because of the flexibility and usefulness of the software. I have used this because it is very simple to use and to add any text, images or any tools to the website easily. When creating my website there were many tools and techniques I used to create my website and making it interactive.

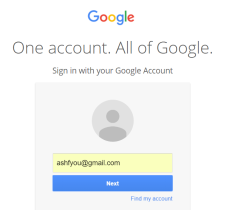
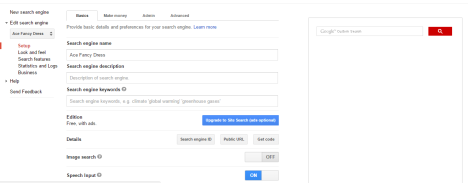 Adding a search bar: Search bar is really important and websites need to have a search bar as it makes it easier for the users to find something quickly. In order to create a search bar in adobe muse you will need a Google account. Then you can easily create a search engine and also you can edit it as well and when you done just click on get code .You will get a code and you need to go back to the website and just paste the code and it will occur a search bar like this.
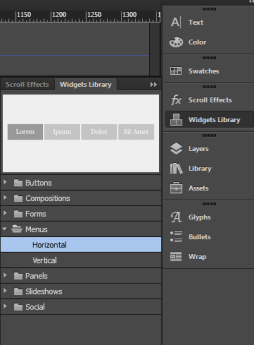 Navigation bar:Â Navigation bar is very useful as it helps the user to navigate the site easily; it makes the site look more professional and attractive so it can attract the audience to view the page. To add a navigation bar you need to click on “Widgets library” then it will appear a small window and you just need to click on “Menus”. It’s up to you if want a “horizontal” or “vertical” menu just click on it and it will come up like this
.


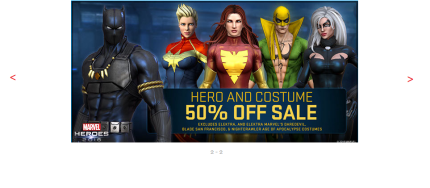
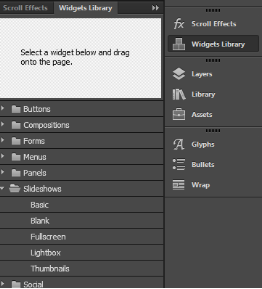 Slideshow: Slideshow is a really useful tool to organise and compress information. By using a slideshow you can easily showcase images and can show much more information and it allows accessing the information quickly. This is a good tool to make the website more appealing and eye catching. To add a slideshow you will need to click on “Widgets library” and it will appear a window showing different tools. You just need to click on “Slideshows” and it will show you different options. You can choose any from the list and then click on it. It will come up like this.
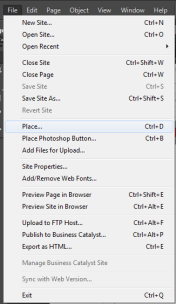
Insert image- This tool is used to insert any kind of image file on the website. This is a very important tool as it helps to make the website visually engaging by catching the user’s attention and makes it a bit more interactive and interesting. In order to insert an image, you need to click on “File” and then just click on “place” and it will take you to the image file where you have saved all the images and just select the image and click on “open” . It will come up like this. If you have more images to add just repeat this step.

Hotspot: Hotspots work almost the same as links. This is useful as it helps the users to access the website quickly. Too add hotspot on the slideshow you just need to click on the image first, then on the top you need to click on the arrow and it will show you a drop down menu like this.
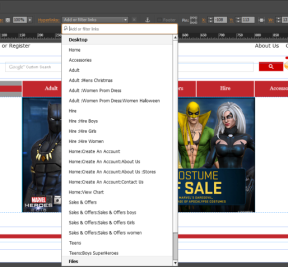

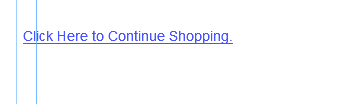
Link: This tool is used to link all the page and media together. So the user can navigate through the website hyperlinks are put in place to help the user to get from one page to another. I have linked all of my pages together by using the hyperlinks, also I have made sure that all of the text that I have written is easy to read and easy to get to as well as the visible links to navigate each of the hyperlinks within my website. I used hyperlinks to allow the users to navigate around the website. To add hyperlinks on the text you will need to highlight the text first and then click on the hyperlinks arrow and it will show you a dropdown menu and this will allow you to add the hyperlinks on the text.

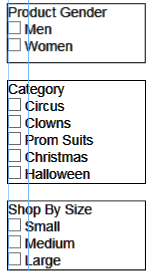
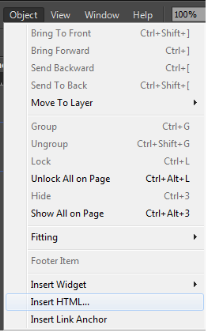
Html: I used HTML coding when creating the website. I used it when copying the embed codes for the search bar and radio button list and using the code feature of adobe muse to add these to the website so that users are able to see research the product . To insert an html code you will need to find the suitable
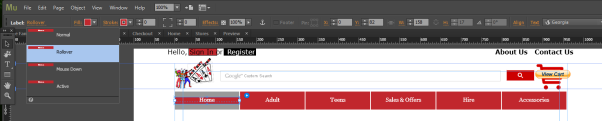
Rollovers: Rollovers are buttons on a website that change when the cursor moves over it. Rollovers make the website look better and make it easier for the users to use the menu bar. This is because the button can changes the colour to make the website more exciting. The rollover shows that user that it is a button and that it is hyperlinked. In order to do this you can just need to click on the “label” and it will show you few options and then you need to click on “Rollover”


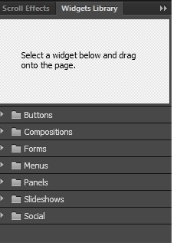
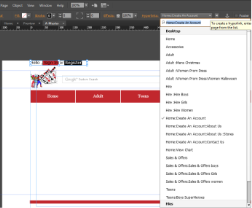
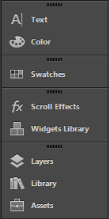
The widgets library is really useful as you can see in the screenshot you can use different tools from to create different thing. So if you can click on the buttons it will allow you to add buttons, if you click on the menus it will allow you to add menus on the page and also if you click on the social you will be able to add different social media widgets.
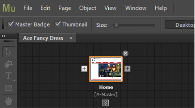
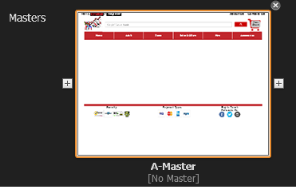 Master Page: A master page is like a background that you can quickly apply to many pages. If you add any objects on a master page on all pages with that master applied.
Adding extra pages: I have added extra pages because they work very well for giving users a visual map of where to go. To add extra pages you just need to click on the small “plus” icon and it will show you a blank page and to add more pages just repeat this.

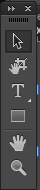
I have also used some of these tools. The first tool I have used from the tool bar is the “Selection” tool to move objects around like images, texts etc. I have also used the text tool to create text frame and typed inside it and the last tool I have used from the toolbar is the rectangle tool and which allows drawing rectangle boxes. So you can use these tools to make the website layout professional.
 I have also used text tool to make the texts more visible and easy for the users to read. I have used different fonts as the font on a website is very important as it shows the style of the website I have made the texts big enough for the users so they won’t have any problem understanding the text. I have also used colour to make the website looks more appealing and eye catching, so by using these tools you can easily modify
 I have also used the color tool to colour the texts, boxes etc. and also to make it more visible and noticeable for the users to notice. In order to add colour just click on the “colour tool” and it will allow you to add colour into anything.
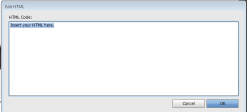 Animation: I have also used animated slide in text to make the website looks more professional. To do this you just need to go to internet and find the Html code and then insert the code into the box and click ok.


The plan mode: There are four different plan modes. I have used the plan mode; the plan mode is the structure of the site or the site map. The design mode where you can edit the pages and add different tools. So if you click on the “Design” it will allow you to add tools on the pages and make some changes etc. Also the Preview mode allows you to review the page and you can see what you have done and it allows accessing the tools you have used on the pages. The last is the publish mode I didn’t use that mode, it allows you to upload the website to the business catalyst and can easily view it on online.
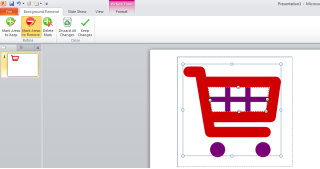
Microsoft PowerPoint: I have used Microsoft PowerPoint to remove the background of the images. To make it fit with pages I had to use PowerPoint because you can easily remove the background of the image in a PowerPoint and it’s much faster than Photoshop and it’s very easy to do it.
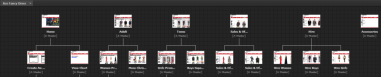
Structure Diagrams: The stricture diagram for website shows how website will linked webpages are access and stucturesd. The websites usually only uses three different structures: linear, hierarchical and matrix. Structure diagram helped me to plan how I wanted the pages to be structure. The structure diagram helped me to get started fast and I have made the website in a hierarchical way because it is structures with each web page and linked with a number of different pages. The hearicaial is a good way for the user to access the website; as the hierarchy gets higher, the content is more refined by the user is trying to locate.
Story Board: Before even construct my website a plan was needed in order to make sure I knew what was to be put on the website. After this, through the use of a storyboard it made it easy to construct a website based on the designs. From the story board and planning of my website. I finally came to the end of the website and I realised that at first it seemed like a very long process when I started making the website it helped a lot as I could easily reference to make sure that my initial ideas we all included.
Mood boards: Mouldboard also helped a lot when I was constructing the website. This helped me to make sure what colour, texts and images would be the best for the website and would make it look professional and eye catching. Through the use of mood board I made the website looks professional.